Choosing the Right Repair Approach
Not all drywall damage is the same, and using the wrong method wastes time and materials. Match your technique to the size of the damage:
- Nail holes and small dents (under ½ inch): A lightweight spackling compound applied with a putty knife and sanded smooth is all you need.
- Medium holes (½ inch to 4 inches): Self-adhesive fiberglass mesh patches provide a rigid base for joint compound without cutting new drywall.
- Large holes (4 inches to 12 inches): A California patch - cutting a square around the damage and using paper-faced backing - works well without requiring extra lumber.
- Fist-sized or larger gaps: You'll need to cut back to the nearest studs and install a new drywall panel secured to backing boards or framing.
Before starting any repair, check the surrounding area for moisture, mold, or soft spots. Discolored or crumbly drywall may indicate a plumbing leak or chronic humidity problem. Address the root cause before patching - covering water-damaged drywall without fixing the source will only lead to repeat repairs. If mold is present, consult a qualified remediation professional rather than patching over it.
What you will need
Tools and Materials You'll Need
Gathering everything before you start prevents mid-job trips to the hardware store and keeps your workflow efficient.
Putty knife or drywall knife (6-inch)
Applies and smooths joint compound over patches of all sizes.
Lightweight spackling compound
Fills nail holes and small dents quickly with minimal shrinkage.
All-purpose joint compound
Used for feathering edges and finishing coats on medium-to-large patches.
Self-adhesive fiberglass mesh patch
Bridges medium-sized holes and provides a stable surface for compound.
Drywall screws and backer boards or 1x3 lumber
Supports new drywall panels when repairing large or fist-sized holes.
Sanding sponge or sandpaper (120- and 150-grit)
Smooths dried compound between coats and before priming.
Drywall primer
Seals the patched surface so paint absorbs evenly and doesn't flash.
Utility knife
Scores and cuts drywall cleanly when removing damaged sections.
For texture matching, keep a small brush or sponge handy. Many older homes have orange-peel or knockdown textures that require a specific technique to replicate before painting.
Step-by-Step Repair Instructions
Follow these steps in order regardless of hole size - the core sequence remains the same, though larger repairs require extra prep and additional drying time between coats.
Clean and prepare the damaged area
Remove any loose paper facing, crumbled gypsum, or protruding fasteners from around the hole. Use a utility knife to trim ragged edges so you have a clean perimeter. For nail holes, drive the nail slightly below the surface with a hammer and nail set rather than pulling it out - this creates a clean dimple to fill rather than a torn edge.
Apply your patch backing (medium to large holes only)
For holes between ½ inch and 4 inches, center a self-adhesive mesh patch over the opening and press firmly. For larger holes, cut the damaged section back to a clean rectangle, then screw backer boards (1x3 lumber works well) behind the opening on each side so they extend several inches beyond the cut edges. Secure new drywall to the backers with drywall screws, spacing them every 8 inches.
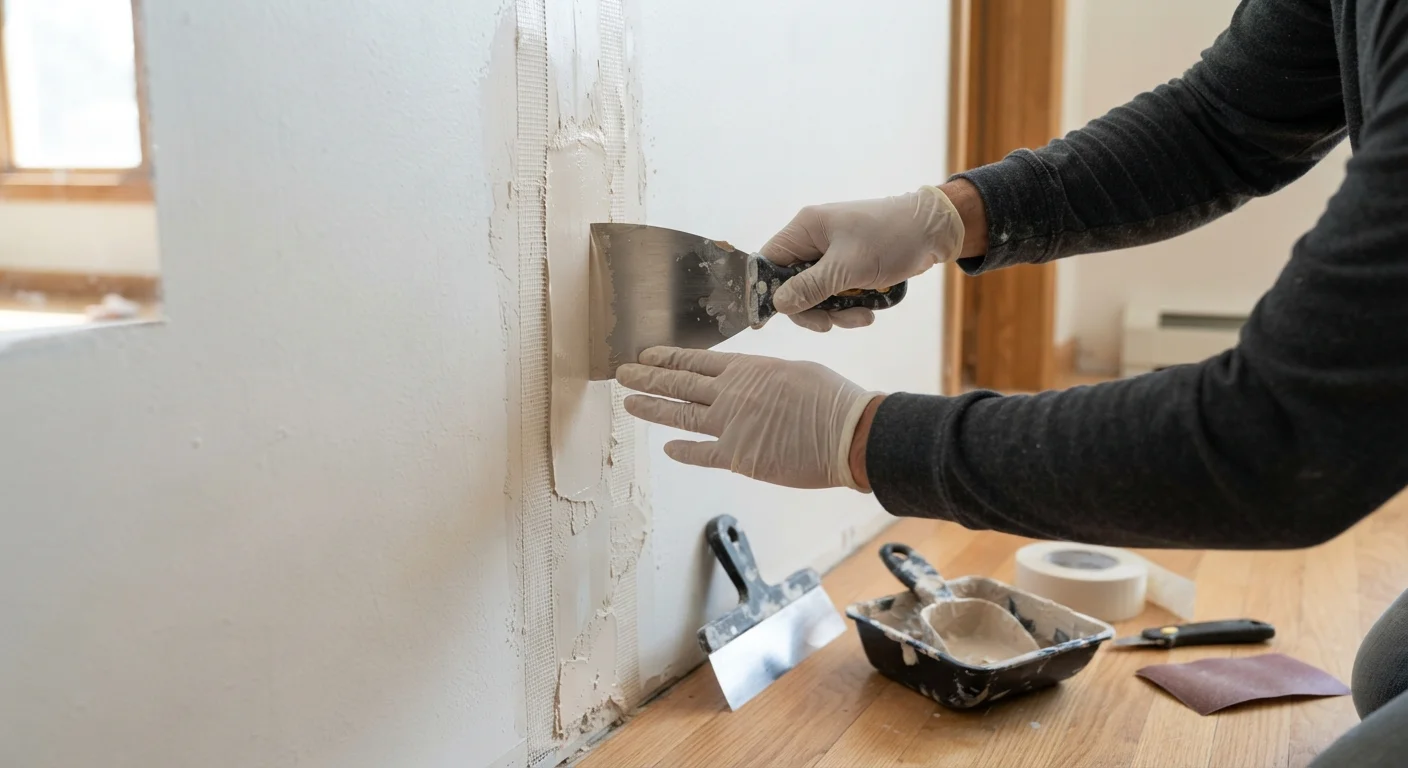
Apply the first coat of joint compound
Scoop a modest amount of all-purpose joint compound onto your knife and spread it over the patch in a smooth, even layer. For mesh patches, press the compound firmly through the mesh first, then smooth over the top. Feather the edges outward at least 2-3 inches beyond the patch perimeter. Keep this first coat thin - its job is to embed the mesh or fill the seam, not to achieve a finished look.
Sand, then apply additional coats
Allow the first coat to dry completely - typically 24 hours at room temperature, longer in humid conditions. Sand lightly with 120-grit paper until smooth, then wipe dust away with a damp cloth. Apply a second coat, feathering 2-3 inches wider than the first. Most repairs need two or three coats total. Each successive coat should be thinner and wider than the last.
Final sand and inspect
After the last coat is fully dry, sand the entire repair area with 150-grit paper using light, circular strokes. Hold a work light at a low angle to the wall - this raking light reveals any ridges, divots, or unfeathered edges that will show through paint. Apply a thin skim coat to any imperfections and re-sand once dry.
Working in Low-Humidity Conditions Helps
Joint compound dries by evaporation, not chemical curing, so high indoor humidity significantly extends drying time. If you're working in a basement or during rainy weather, run a dehumidifier or a fan to keep air moving. Never rush drying with direct heat - it can cause the surface to crack while the interior remains wet.
Finishing, Texture Matching, and Painting
A technically correct patch can still stand out if the finish doesn't match the surrounding wall. After your final coat of compound is fully cured and sanded to 150-grit smoothness, apply a drywall-specific primer to the patch. This step seals the compound's porous surface so paint absorbs evenly - skipping it often causes a dull, flat spot called flashing that becomes visible when light rakes across the wall.
If your wall has texture, replicate it before priming. Common methods include:
- Orange peel: Thin joint compound and apply with a hopper or aerosol texture can, adjusting distance for droplet size.
- Knockdown: Stipple thinned compound with a brush or roller, then flatten peaks lightly with a broad knife after 5-10 minutes.
- Skip trowel: Apply irregular patches of compound by hand, then lightly skim the surface when partially set.
Once the primer is dry, apply at least two coats of your finish paint - matching sheen is as important as matching color. A fresh coat of flat paint over a previously eggshell-finished wall will look noticeably different in varying light. When in doubt, paint the entire wall panel from corner to corner for the most consistent result.
Homes Built Before 1980: Test for Lead Paint
Sanding walls in older homes can release lead dust if the existing paint contains lead - a common occurrence in homes built before 1978. Use an inexpensive lead test kit before sanding. If the test is positive, follow EPA RRP (Renovation, Repair, and Painting) guidelines, which include containment, HEPA vacuuming, and proper disposal. Consider hiring a certified renovator for larger projects.