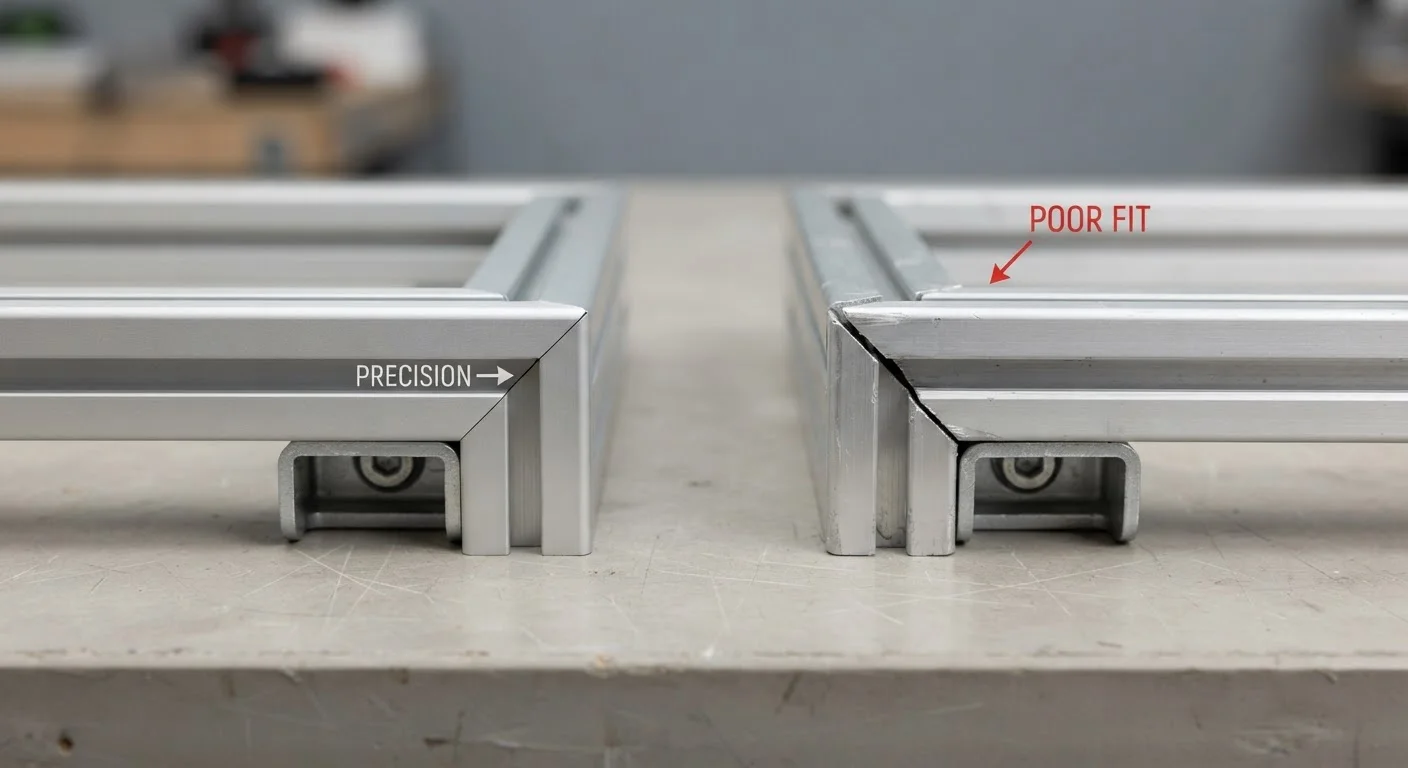
A checklist of observable indicators — materials, seams, tolerances, finishes — that help you evaluate how well a product is constructed.
Key Takeaways
Material composition matters more than surface appearance when judging durability.
Seam alignment, tolerances, and joint finishing are among the most reliable build-quality indicators.
Finish consistency and hardware behavior reveal how carefully a product was manufactured.
Observable details at the point of inspection can predict long-term reliability.
Perceived quality cues like weight and packaging are not always accurate proxies for construction quality.
Why Build Quality Is Worth Reading Closely
Build quality describes how well a product is physically constructed - the materials chosen, how components are joined, and how consistently manufacturing standards were applied. It's distinct from brand reputation, price tier, or aesthetic appeal, all of which can diverge significantly from actual construction quality.
Learning to assess build quality directly gives you a layer of evaluation that marketing language can't replicate. Products that look identical on a shelf or a product page can differ meaningfully in how they perform over months of regular use. The checklist below focuses on observable indicators - things you can examine, touch, and test without any specialized tools.
Identify the primary material and verify it matches what is stated - look for material markings, stamps, or labeling rather than relying on visual appearance alone.Must
Check whether load-bearing or high-contact areas use the same material grade as the rest of the product, or whether cheaper substitutes appear in those zones.Must
Press or flex the material gently where it won't cause damage - quality materials typically return to shape without creasing, cracking sounds, or permanent deformation.Should
Look for material consistency across the whole product - color variation, texture shifts, or mismatched densities can indicate mixed-grade or substituted components.Should
Seams, Joints, and Fasteners
Inspect all seams and joints for uniform gap width - inconsistent spacing or visible misalignment indicates assembly precision problems.Must
Check that fasteners (screws, rivets, staples) are fully seated and flush with the surface - proud or recessed fasteners suggest poor tolerancing or rushed assembly.Must
Look at welded or bonded joints for excess adhesive, oxidation, pitting, or visible porosity, which can signal weakened structural integrity.Should
Test hinges, clasps, and moving joints by operating them slowly - smooth, even resistance throughout the range of motion indicates better manufacturing tolerances.Should
Surface Finish and Coating
Examine the finish under direct light at a low angle - rippling, orange-peel texture, bubbling, or uneven sheen point to inconsistent application.Must
Check edges and corners for complete finish coverage - these are the first areas to show skipped or thinned coating.Must
Run a fingernail lightly along a hidden interior surface to test adhesion - a finish that chips or lifts easily under minimal pressure will degrade faster in regular use.Should
Verify that branding, labeling, and decorative elements are integrated into the finish rather than applied as stickers, which tend to peel and obscure wear patterns.Nice to have
Tolerances and Fit
Close any doors, lids, or panels and check that mating surfaces align - gaps that are uneven on opposite sides of the same panel indicate tolerance problems.Must
Apply slight lateral pressure to assembled components and note any unwanted flex, rattle, or shifting that would worsen with use.Must
Check that removable parts (batteries, inserts, attachments) seat fully and release consistently without excessive force or wiggle.Should
Hardware and Mechanical Components
Operate all mechanical controls - buttons, switches, dials, sliders - and note whether feedback is consistent and whether travel distance matches across identical controls.Must
Look at metal hardware for surface rust, burrs, or stamping irregularities that suggest cost-cutting in component sourcing.Should
Confirm that spring-loaded elements return fully to their rest position without binding or requiring manual assistance.Nice to have
How to Use This Checklist in Practice
Work through these checks systematically rather than skimming for a single red flag. Build quality is cumulative - one imperfect seam may be acceptable; several issues across multiple categories usually isn't. Use the priority levels to triage: focus on must items first, then layer in should checks when you have time.
Don't Rely on a Single Indicator
No single check definitively confirms or disqualifies a product's build quality. A tight seam doesn't guarantee the underlying material is appropriate for the application; a minor finish inconsistency on an interior surface may not affect durability at all. Use the full checklist as a composite picture rather than treating any one item as a pass/fail gate.
This checklist is most useful when you can physically handle a product before purchasing. When evaluating online, apply the same categories to close-up product imagery, manufacturer specifications, and independent teardown reviews where available. For a broader framework on evaluating unfamiliar product categories, the smart habits for evaluating any product category guide offers transferable techniques that complement what's here.
Once you've completed your assessment, it helps to pair build-quality findings with purchase context. A well-constructed product at a poor value point is still a questionable decision - separating a good deal from a good purchase covers that distinction in detail. And if you want to turn this kind of evaluation into a repeatable habit, building a pre-purchase routine that actually slows you down explains how to structure it around your real shopping behavior.
Required
Flashlight or phone torch
Illuminates seams, finishes, and joint details at angles that reveal defects not visible under standard lighting.
Optional
Magnifying glass or phone camera zoom
Allows close inspection of fasteners, finish texture, and material markings without specialized equipment.
Required
Manufacturer spec sheet or product listing
Provides stated material and tolerance claims to compare against what you observe during physical inspection.
Shopping Editorial Team is the collective byline for our editorial team and contributor network. Articles published under this byline or an editorial pen name are researched, written, and reviewed according to our editorial standards for clarity, consistency, and independence before publication.
The content on this site is for informational purposes only and is not a substitute for professional advice. Always consult a qualified professional for guidance specific to your situation.